Hi,
In this post, I’ll show how to enable scrolling in a particular view in iOS. That is, say if you have many elements to be added in a view and that won’t fit in one screen of the phone. In that case there will be a need for adding scrolling to the view.
By default, a view will have a fixed height (the height of the screen). But most of the times, there are way too many UI elements like textboxes, labels, etc. that need to be added to the view.
So in order to do that, we need to follow the below 5 steps :
- Remove Auto-layout for the view controller of the view that needs to have scrolling
- Set the “Size” attribute of the View to “Freeform“
- Increase the height of the view to required dimensions
- Add a scroll view to the view
- !important Enable scrolling to scrollview and set the dimensions of it
The above steps are shown below through screen shots:
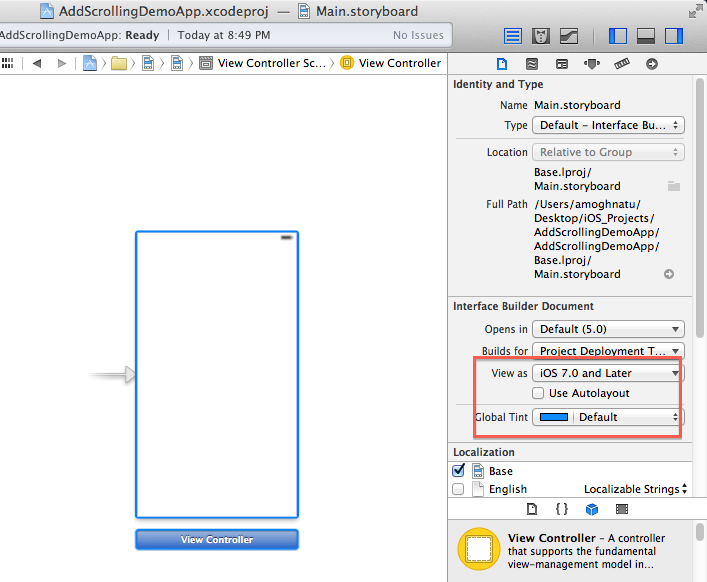
- Remove Auto-layout for the view controller of the view that needs to have scrollingFirst select the View controller by clicking on it in the storyboard, then uncheck the check box on the right.
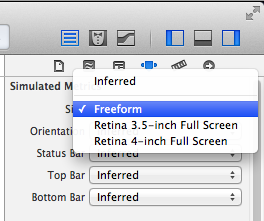
- Set the “Size” attribute of the View to “Freeform”In the Attributes inspector, under the Simulated Metrics section, change the value of Size attribute to Freeform
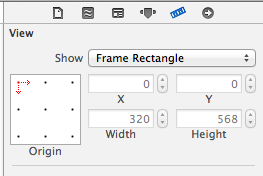
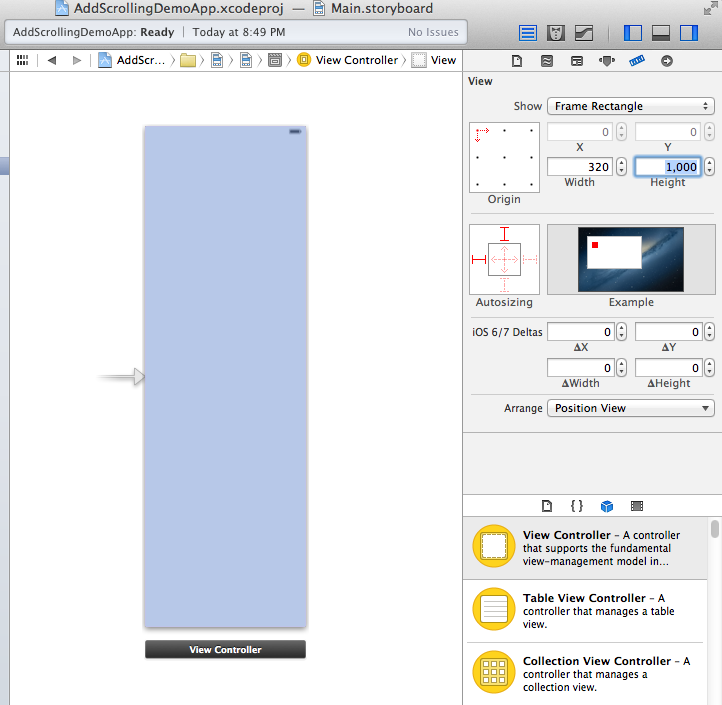
- Increase the height of the view to required dimensionsIt is important to note that BEFORE the size is chanegd to Freeform, the dimensions of the view will be disabled as shown below
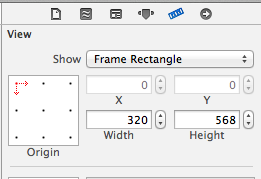
After the size is changed to “Freeform”, we can see that the dimensions are enabled to change as shown below.
Increase the value of the Height element as required and hit enter. This will make the view to the changed size. A sample is shown below.
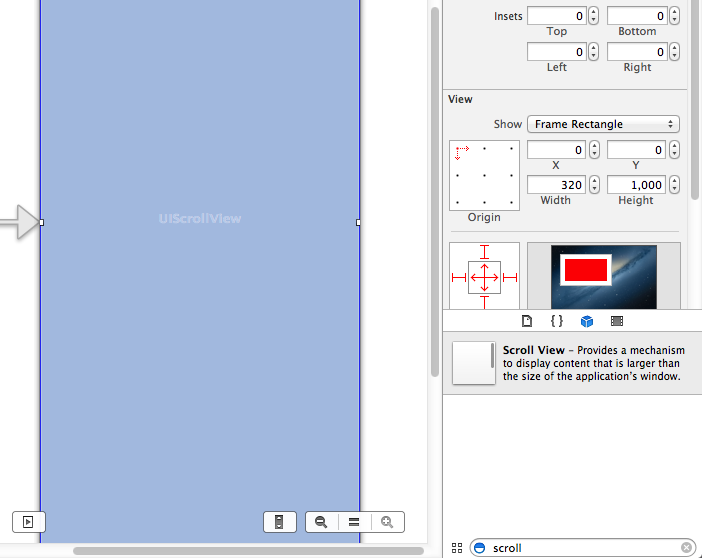
- Add a scroll view to the viewFrom the objecct library, drag and drop a scroll view on to the view. By default, it will occupy the entire space of the view. Re size it as required.
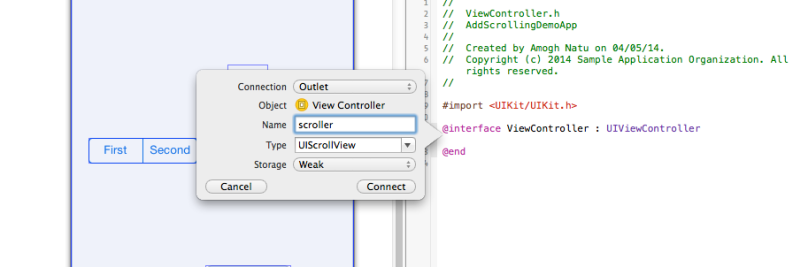
- Enable scrolling to scrollview and set the dimensions of itThis step is very important and needs to be done in order to enable scrolling for the view. We have to add an outlet for the scroll view and synthesize the same in the implementation. This is to give ourselves a reference to the scrollview for programatically enabling scrolling and setting it’s dimensions. The steps are shown below.

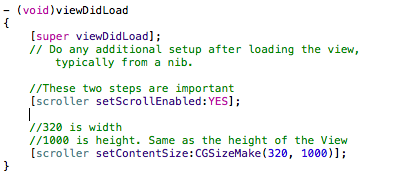
Now, enable the scrolling and set the dimensions. Sample code shown below:


Now, all the required steps are done. Only thing that needs to be done is add the elements to the screen and run it. For the purpose of this post, I’m randomly dragging some elements on to the view and running the app.
Now, run the app and verify that scrolling has been enabled.


I have put the above sample project for download here. You can download the zip file by clicking on File–>Download. Please let me know if there are any changes or improvements that can be done here.
Hope this helps!

